slideshow
slideshow
-
Animated caption with Page Builder CK

You can combine Slideshow CK and Page Builder CK to make advanced layouts for the caption on the slides. You can create the content whithin Page Builder CK, style it, add some animations, use the responsive settings and load it in the slide.
-
Autoplay video
You can load a video in your slides using the slides manager directly into the module.

Hosted or local video ?
The first question to ask is what video do you want to use. A hosted video like Youtube, or a local (MP4) file located on your own server/site ?
- Hosted video
Most popular hosting system of videos like youtube have their own method to launch a video with the autoplay feature. Example with youtube, you can give the link to the Youtube player + your video ID :
https://www.youtube.com/embed/jFlB6tSjyDYThis is the url that you must enter into the video field of your slide. Now if you want to autoplay the video on page load, you can add
&autoplay=1in the url like thishttps://www.youtube.com/embed/jFlB6tSjyDY&autoplay=1See the documentation of Youtube
https://developers.google.com/youtube/player_parameters
If you are using another hosted video service, you can check its documentation to see how it works.
The autoplay option on the slide has no effect as the autoplay must be managed by the video hosting service.
Local video
You can use the edit button in the video field to open a popup where you can browser your medias folders and search for a video file. Select the file you want to use and it will be added in the slide options.
You can use the
Autoplayoption to select if you want the video to play when the slide is loaded, or not.If the url of your video starts with
http, then it will be considered as a hosted video and not a local one.Browser compatibility
This is an important note about why it does not work. You must understand that the web rules are changing fast and the browsers are not limiting the ability to play a video automatically, and to enable the sound for it.
Firefox :
You must check if you have enabled the sound and video in the browser

Google Chrome :
Especially for Chrome, the video must be muted to allow the autoplay feature. So if you set your video to autoplay, you will need to manually enable the sound using the video controls
-
How to create your first slideshow
Using Slideshow CK you can create your first joomla slideshow within minutes. This is very easy to use.
Create a new Slideshow CK module
Go in your modules manager (
Menu>>Extensions>>Modules) and click on theNewbutton to create a new module. Then select the module typeSlideshow CK.

Setup the module - Publish, assign
When you have selected the Slideshow CK module type, you will get a new module with all options set by default. To see this slideshow on your website you will need 4 things :
- Give it a
Title - Select a
Positionwhere to show the slideshow (this is relative to your template positions) - Set the module state to
Published - Set the
Menu AssignmenttoAll pages(you can use a different option here if you want to set up more advanced settings)
Title, Position and Published options

Menu Assignment options

You can also choose to
Hidethe title, because in most cases you don't want a title on your slideshow. Then click on theSavebutton and see in frontend, you must see your slideshow working.
Now your slideshow is working, and this needed only 2 minutes to be done. Not longer than any other module. What becomes interesting now is to set your own images in the slideshow.
Set up your own images - Using the slides manager
In the Slideshow CK module options, go in the
Sourcetab to select how to load your images in the slider.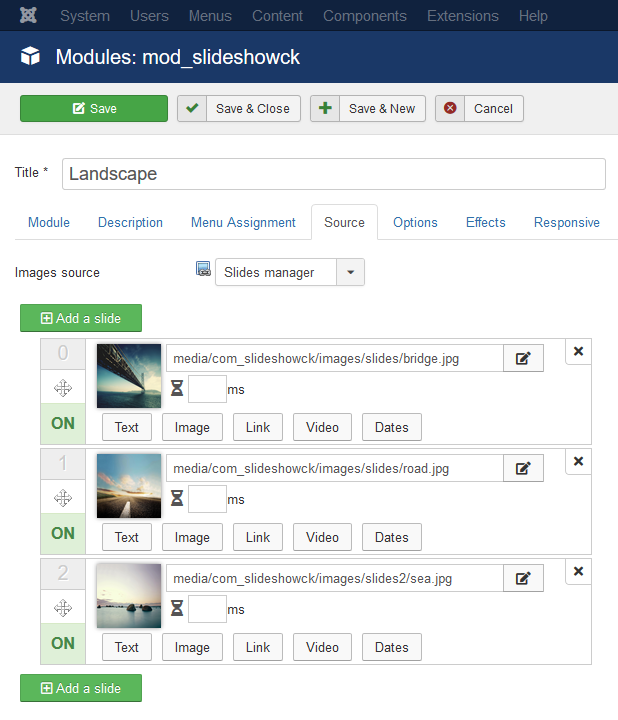
In the slides manager you can easily add, move, remove the slides, you can also toggle the ON/OFF state to disable a slide without removing it.
To put your own image, click on the image preview or on the edit icon near the image url, to open the CK Media Manager that is integrated with Slideshow CK :
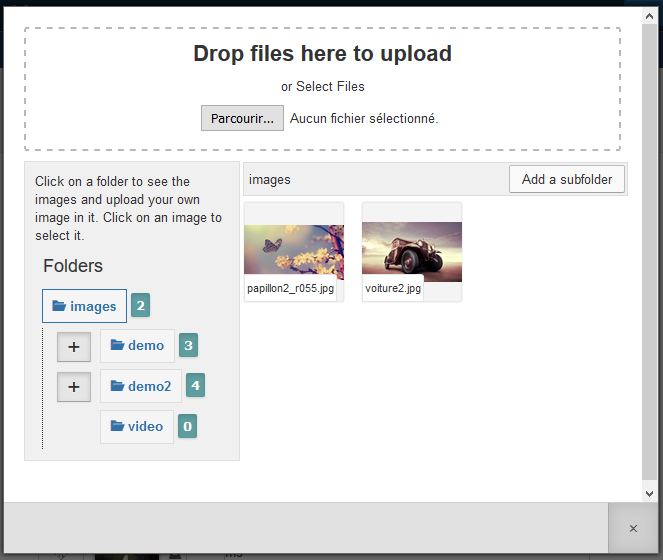
You can navigate in the folders structure, and click on the image that you want to put in the slides. You can also add more slides by clicking on the Add a slide button.
There are also other features in the slides manager that you can explore to set up your slides with a text, video, link, etc...
Read how to Use the Slides Manager for more details
You can also use the Pro version to load your slides from a folder, Flickr, Google Photos, Hikashop,... and more !
- Give it a
-
Load your images from Google Photos
You can load the images from a Google Photos album directly in your slideshow. The only thing that you need to do is to give the album url.
Go in your
Google account>>Google photos>> Navigate to the desired album >> Copy the page urlYou shall get an url like this
https://photos.google.com/share/AF1QipNNAl5oOJRLl0ZNURhzou2UWsGyAJhAfBXDY-Cx2_zROmLEjMtocQrIRCCTEYVMrQ?key=cGc3VkJwWko3el9HSGh3RlcxdkZxYjdYakJNeDBRThen paste this url into the field in the Slideshow CK module

Note that this will get the image size directly from the album page, there is no option to get a higher resolution. This is usefull if you want to show your album without a very high resolution.
-
Set up the access rights
If you have multiple users on your website you may need to setup the user access for each group of them.
Set up the options for all modules
You can choose which user group can access your modules. Go in the website
administration >> System >> Global configuration >> Modulesand set up the rights as needed
This configuration will apply to all your modules. See the Joomla documentation for more informations about this feature.
Set up the options for Slideshow CK
You can also check the rights for Slideshow CK, this includes the following features access :
- Link selection
- Style edition and selection
- Media Manage CK to select and upload images
Go in the website
administration >> System >> Global configuration >> Slideshow CKand set up the rights as needed
-
Set up your images caption from a folder

When importing images from a folder to show in the slideshow you can use a file to tell how to show your images. You can set up the title, description, link, video and the order of the images will be set up as they are in your file.
You just have to edit one file to have a total control how what to show in your slider.
-
Setup a slideshow with thumbs
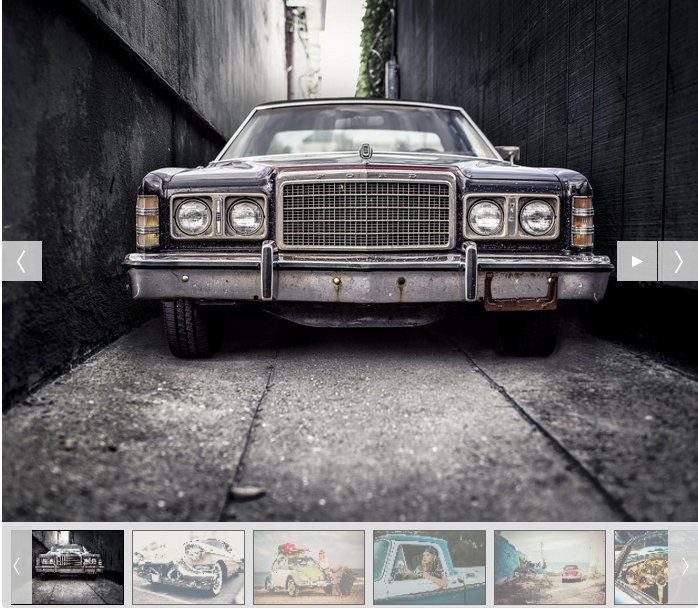
By default the slideshow is displayed with small dots on the images: it's pagination. According to your need you want to display the thumbnails of the images without pagination. To do this go to the module options and set them like this
Pagination: noThumbnails: yes
And here's the result :
-
Use the slides manager

The slides manager integrated with Slideshow CK offers many features to allow you to create your slides in a fast and easy way. Here is a list of the features that you can use :
For all slides
- Create a new slide
- Remove a slide
- Move slides with drag and drop
For each slide
- Select an image
- Set a text to show in the caption
- Set a specific duration
- Set image alignment
- Set a link
- Set a video that will be loaded with a player
- Set dates to limit the slide publication
- Enable / disable the slide
Let's see these options more in details :
Select an image

Click on the image, or on the edit icon at the right of the image path and you will open the Media Manager CK that is included with Slideshow CK. Here is what you will get :

You can browser through your folder with an instant preview of the images, the image names and you can click on the image that you want to select to put it in the slide.
Set a text to show in the caption
You are not obligated to give a text or to use a caption on your images, but this is something that you can do easily. There are 2 options:
Custom text: here you can write what you want as title and
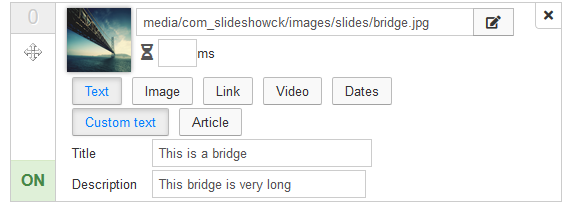
Article: you can select an exising article that will be loaded in the caption. The article title will be used as title, and the article content as text. You can use the Character length option of the Slideshow CK module to limit the number of character to show in the caption
To select your article, click on the edit icon, this will open a popup with the articles list. Just click on the article that you want to select and it will be added in the slide

Set a specific duration
In the slide, just at the right of the image you can see the hourglass icon. You can set a duration in [ms] here, this will force the slide to be show during this time value. If you don't set any value here, then the module option
Effects >> Display timewill be used. By default this value is set to 7000 (= 7 seconds).Set a link

You can give a link for each slide, this can be any url. You can
- Write an external or custom url : just write what you want in the field
- Use a menu item from your website : click on the edit icon that will open a popup with the menus. You can navigate and select any existing menu item to put in as link on the slide. See what looks like the menu selection :
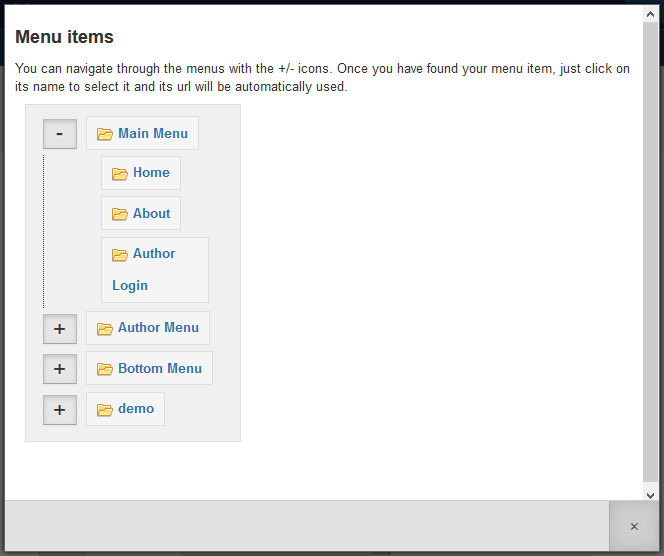
On each link you can also define the target option :
Default: This will use the general setting that is defined in the module optionOptions >> Link >> Link targetOpen in the same window: this will force this slide to open in the same windowOpen in a new window: this will force this slide to open in the same windowOpen in a Lighbox: this will force this slide to open in a Lightbox (see how to Open a video in the Ligtbox for more example of this feature)
Set a video

Even if you want to show a video, you will need to set up an image for the slide. Without image your slide will not work.
Tip : take a screenshot of the video player and use this image in the slide
You can choose if you want to load
- a local video on your server : use the edit icon to select your video with the Media Manager CK that will show you only the videos that are in your website :
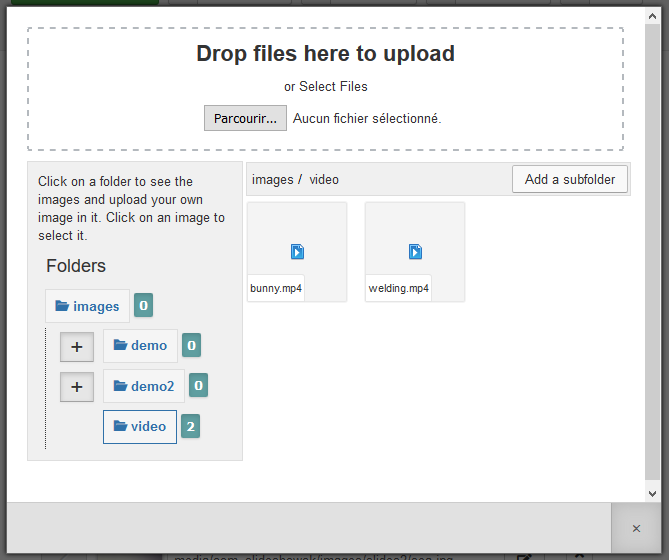
- a hosted video, like Youtube : you must write the url to the video. Take care that you must give the url to the player of the video, not the presentation page.
Example with a Youtbe video :
- the default video url is : https://www.youtube.com/watch?v=Gx6cFtEC_yc- the player video url (that you must use) is : https://www.youtube.com/embed/Gx6cFtEC_yc
You can get this type of url by clicking the share button of the video and select "integrated into an iframe"
Set dates
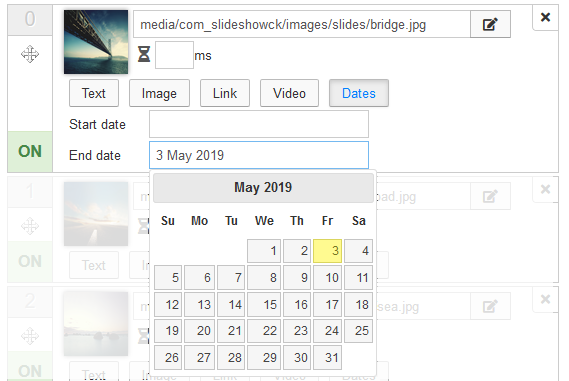
On each slide you can give a start date and an end date. This will be used to check if the slide must be shown in the slideshow. This is a very useful option if you want to create special slides for special events like Christmas, Black Friday or anything else.
Enable / Disable the slide
You can click on the ON/OFF button on each slide to deactivate it. It will not be loaded into the slideshow, but it will remains in the list so that you can still activate it when you need it again. A disabled slide will look like this :


 Protect your forms using Captcha CK. It includes multiple techiques to stop the bots.


News