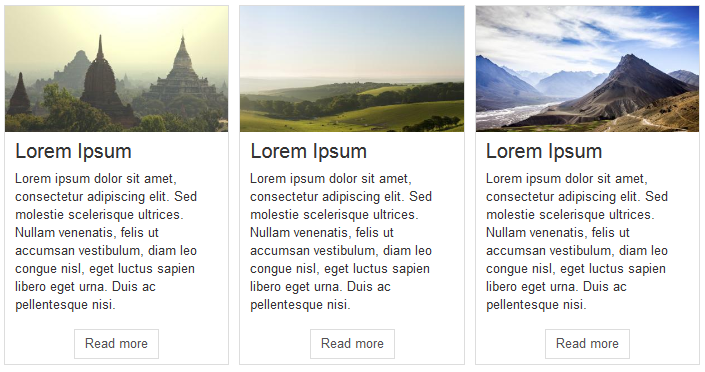
Create an amazing blog layout to display your articles. Drag and drop the blog addon into your page, select the article category, the number of articles and columns, and that's it !
Source or articles

Load images based on
Intro image / First image of the content / Only text.
This is a filter to decide which articles do you want to show in your blog. You can choose to show only the articles that contain an image, or any article (only text).
Select the category
In a fast and easy way, you can select the category by clicking the (+) button. This will open a popup with all categories listed on your website and you can click the one you want to use. You can leave it blank to select all categories.
Other options
There are many other options that you can use to target your articles. You can include the child categories, limit the depth of the categories structure, exclude some articles ...
You can also determine how to order the articles in your blog.
Blog Layout

Number of articles
You can simply limit the number of articles to load in your blog. This way you control how your website displays.
Number of columns / Space between
1,2,3 or 4 columns ? Like you want but this is responsive ! Just give a value in px or % if you want to add some space (a gutter) between each articles.
Layout order and display
You can select what you want to show or not (image, title, text and link). Drag and drop the rows to order the layout according to your needs. No coding required !
Readmore link options
Do you want to add a readmore link to your blog ? No problem, you can add the link to your article title or on a button, and give a text to it.
Note that the text can be translated, if you put a string here and give a translation in the .ini files or using the language override system.
Responsive
Give a resolution at which all the articles will be stacked vertically.
Styling options
There are a lot of styling options, to set the background, the text, margins, borders, etc ... You can style the blog area, each article, the title, the button, etc ...


Options for Image Effect
You can select an effect from Image Effect CK that will apply on the images of the blog. You can then also setup the title and description that will be shown inside the effect on the image.

You can select if you want to show or not the title and the text separately. By default the informations will be used like this :
- title : the article title
- text : the article intro text
There is a possibility to setup a custom title and text on the effect, that is different from the article. This way you can have a custom text in the effect on the image, and the title and text of the article under the image.
To setup a custom title and text you must fill the Intro image caption field in the article

You can separate the title and text by a double point "::". You can also just write a title, by omitting the "::".
Date options
In the layout options you can choose to show / hide the date and select the order regarding the other elements (title, text, etc)

Then few options under that you can also selec the format of your date. The default value is : DATE_FORMAT_LC4
You can change this value to what you want according the PHP documentation. Note that if you are using a multilanguage website, you can also use directly the Joomla language strings, something like DATE_FORMAT_LC4
It will then automatically translate your date format into the current language of the website for your visitors. The Joomla date formats can be found in the file
SITE/language/en-GB/en-GB.ini
Here is the list of the current available values :
- DATE_FORMAT_LC1="l, d F Y"
- DATE_FORMAT_LC2="l, d F Y H:i"
- DATE_FORMAT_LC3="d F Y"
- DATE_FORMAT_LC4="Y-m-d"
- DATE_FORMAT_LC5="Y-m-d H:i"
- DATE_FORMAT_LC6="Y-m-d H:i:s"
- DATE_FORMAT_JS1="y-m-d"
Example of what you can do :

This way your website will be compatible with the multilangual feature.
The Blog addon is part of Page Builder CK Pro


News