Use Page Builder CK to create unlimited designs. You can have nested rows (rows in rows) with an unlimited number of imbricated levels.
Just drag and drop your new Row from the left panel into the parent row, and that's it.
You can :
- Add a row in the page container
- Add a row in another row
- Manage the columns in every row
- Move a row from the page container to another row
- Move a row from a parent row to the page container
- Move a row from a parent row to another row
Everything is responsive, you can control how each row will behave on each resolution !
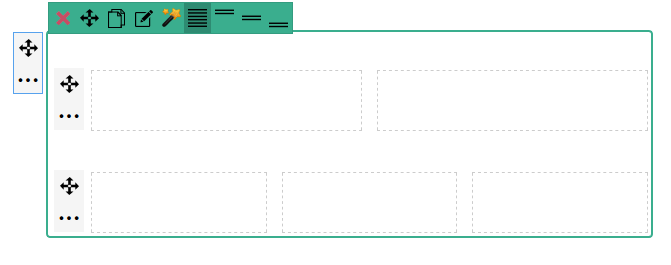
Example of 2 nested rows into a parent row :

The 1st row is the parent. The 2nd row has 2 columns, and the 3rd row has 3 columns.
WARNING : for obvious reasons, we do not recommend to have more than 2 levels of nested rows. The more you imbricate the rows, the more it will be complex to manage.
How to activate the nested rows
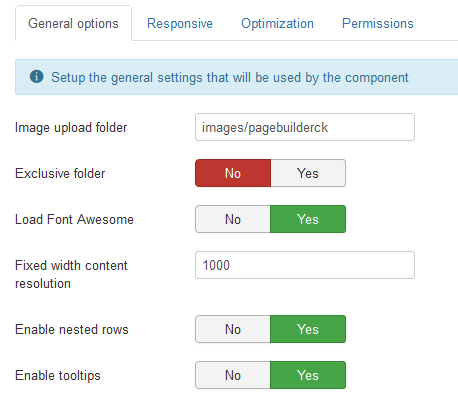
By default the nested rows feature is disabled in Page Builder CK because this adds complexity to the interface when dragging the rows and this is only needed by advanced users. To enable it, go in the Page Builder CK options by clicking the Options button in the top right

and select Yes for the Enable nested rows option

Different colors for nested levels
To improve the interface and the user experience on drag and drop, there are different colors for the placeholder :
- Blue : first level into the wrapper
- Violet : sublevel into a row
Example of a new row added into the wrapper (1st level)

Example of a new row added into another row (imbrication, level 2)

Note that if you create a nested rows design and that you deactivate the nested rows option, when editing your layout again the system will automatically detect it and allows you to manage your nested rows (even if the option is disabled).


News